loader

Activity No. 15: building an automatic barrier (Starter kit Vittascience)

Combine the ultrasonic sensor, servomotor and LED with the NUCLEO-L476 board
To control entries and exits of car parks, automatic barriers are triggered automatically when cars pass. 

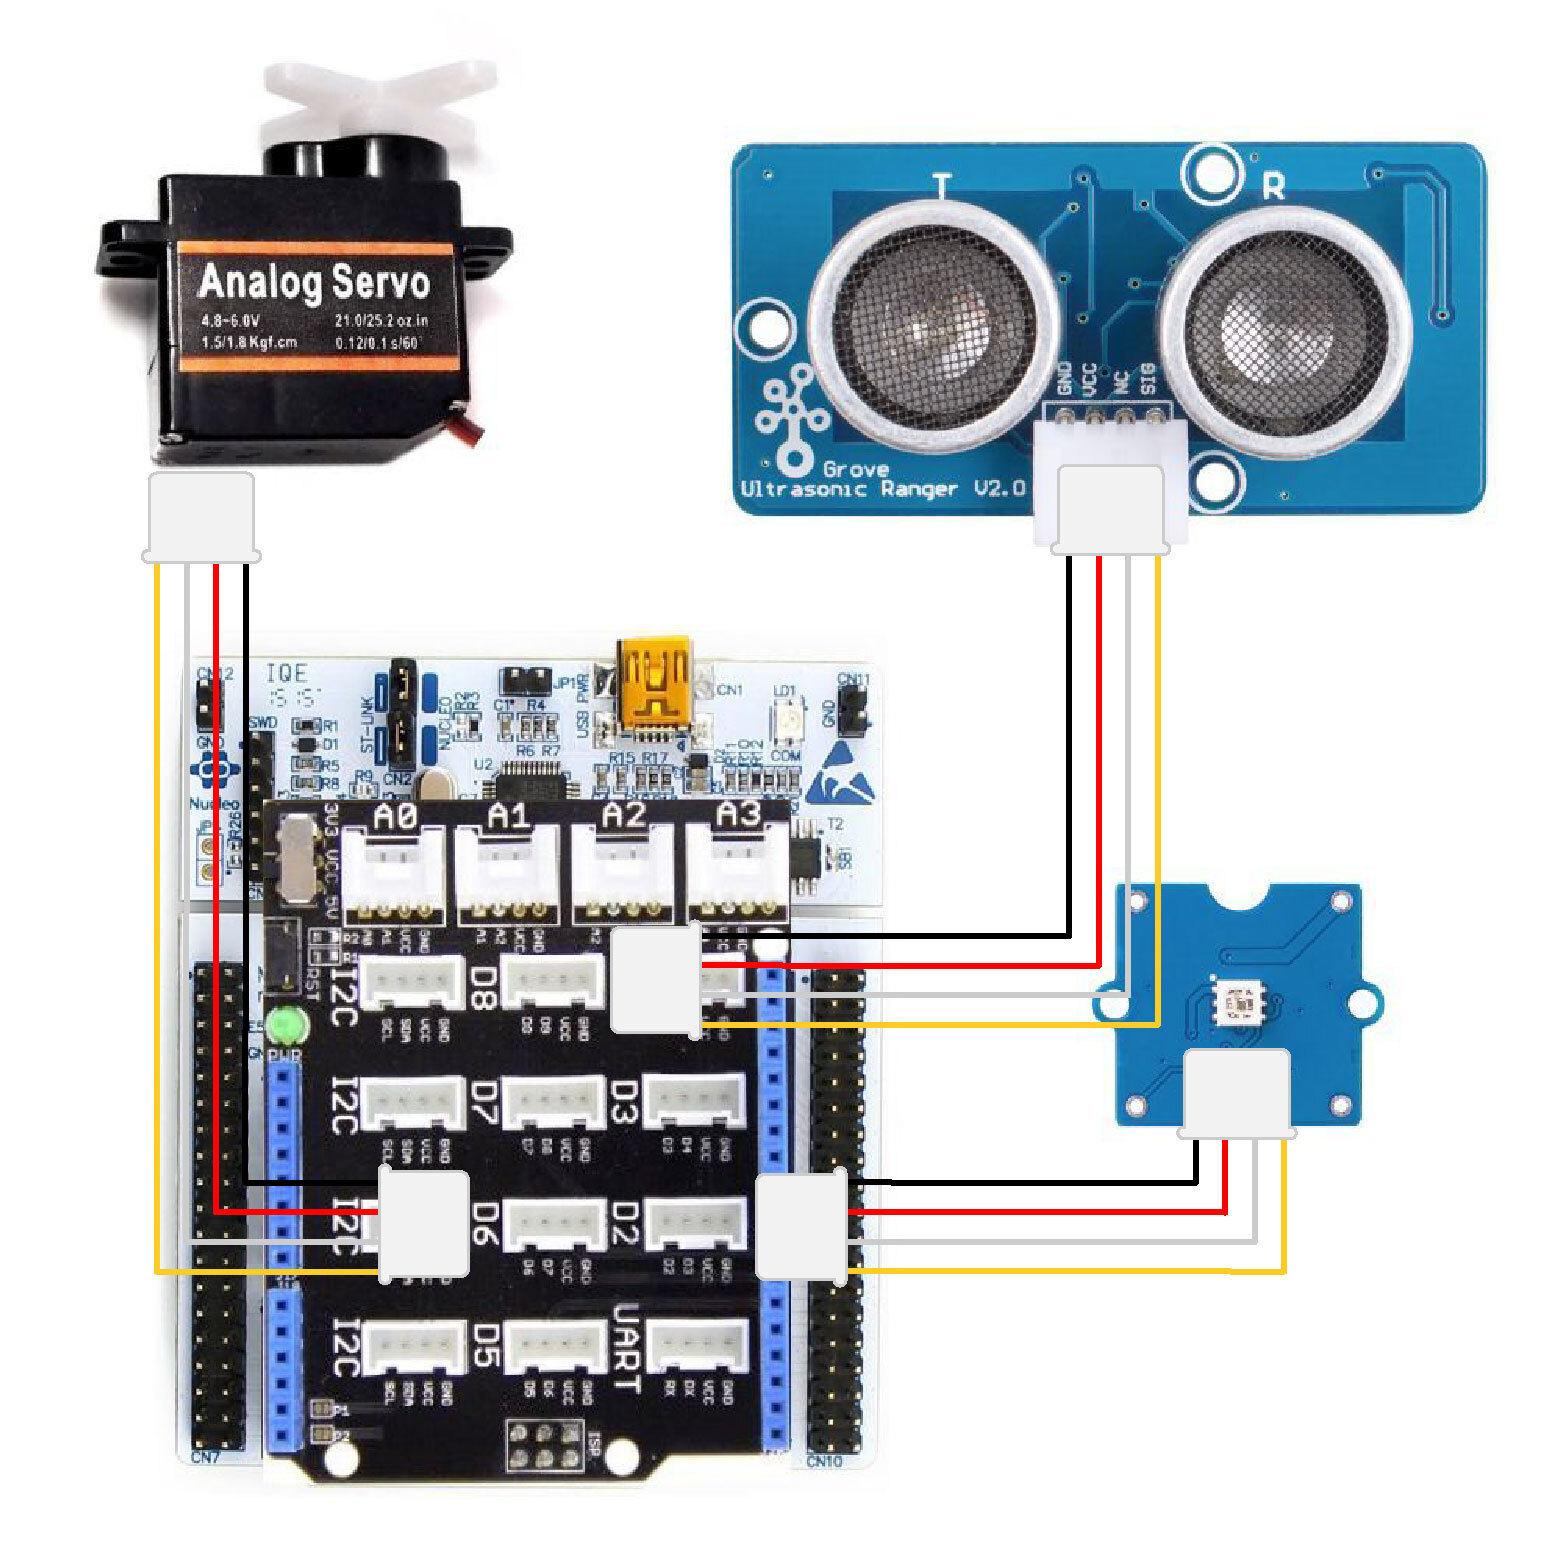
Here is the connection to create the automatic barrier: 
- Connect the Shield Grove to the card connectors. 
- Connect, using the Grove cable, the servomotor to one of the available ports. We will choose port D6. Fix the plastic cross (called rudder) on the top of the servomotor.
- Connect the LED to one of the available ports. We will choose port D2.
- Connect the ultrasound module using the Grove cable to D8.

barrier-EN

Let's get to the programming now! 

The program that we are going to create will trigger the movement of the servomotor (barrier) when a car arrives in front of the ultrasonic sensor.
The LED will be green when the barrier is open and red when it is closed. 

We are going to use several blocks:
- "if...then...else..." available in the Logic of the block locker. 
- "[Grove ultrasonic sensor] distance (cm) D8", available in the Sensors, to retrieve the module value.
- "[Servo motor] control angle at ...° on pin D6", available in the Actuators of the block locker.
- "[Neopixel] control all LEDs at ... on pin D2", available in the Display 


-if the distance is greater than 90 cm then
check all LEDs in red on D2
check the angle at 0° on D6
- if not
check all LEDs in green on D2
check the 90° angle on D6


Use the following interface to create the program: 


Launch the simulator to check the correct execution of your program or upload it to the map. 

You succeeded ? Perfect, you now know how to program an automatic barrier using your NUCLEO-L476RG board! 
Discover the other activities of the Starter kit by clicking on the icons below.

Licencia de uso

Licence Creative Commons

Este recurso está disponible bajo los términos de la licencia Creative Commons Attribution-Share Alike 2.0 France License.